 Pin it
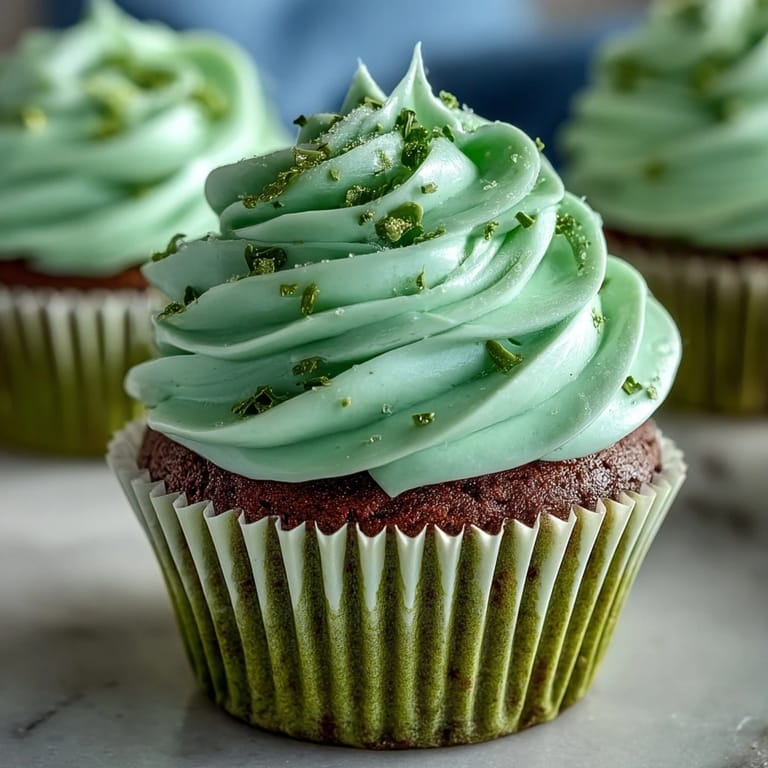
 My neighbor showed up at my door one March afternoon with a box of these emerald-green cupcakes, and I was instantly hooked. The color was almost too vibrant to be real, but biting into one revealed something completely unexpected—a subtle cocoa undertone that made the sweetness feel sophisticated rather than over-the-top. She wouldn't share her recipe that day, but after some kitchen detective work and plenty of trial batches, I finally cracked the code, and now they're my go-to St. Patrick's Day move.
I made these for a St. Patrick's Day potluck last year where someone brought actual Irish soda bread, and I was nervous about standing out. But watching people reach for seconds of these while barely touching the other desserts taught me something valuable—sometimes the unexpected twist is exactly what wins people over. That day, the green velvet underdog beat the traditional every single time.
Ingredients
- All-purpose flour: The backbone of structure, sifted if you have time to prevent lumps that nobody wants to bite into.
- Unsweetened cocoa powder: This is your secret ingredient, giving those cupcakes a subtle chocolate note that makes people ask what's different about them.
- Baking soda and salt: Baking soda reacts with the vinegar to keep things light and tender, while salt simply makes every flavor pop.
- Unsalted butter and granulated sugar: Creaming these together for a solid two minutes isn't just a step, it's where the magic happens—air gets trapped and cupcakes rise beautifully.
- Eggs at room temperature: Cold eggs won't blend smoothly, and you'll notice the difference in the final crumb structure.
- Buttermilk and sour cream: The combo keeps cupcakes moist without making them dense, and the acidity brightens the chocolate.
- Vanilla extract: A teaspoon sounds small, but it anchors all the other flavors.
- Green food coloring (gel preferred): Gel coloring gives that jewel-tone green without watering down your batter like liquid coloring does.
- White vinegar: One tablespoon might seem random, but it's what makes the cocoa pop and keeps the crumb tender.
- Cream cheese and butter for frosting: Both softened means they'll blend into something cloud-like instead of grainy.
- Powdered sugar (sifted): Sifting takes thirty seconds and saves you from lumpy frosting that nobody enjoys spreading.
Tired of Takeout? 🥡
Get 10 meals you can make faster than delivery arrives. Seriously.
One email. No spam. Unsubscribe anytime.
Instructions
- Preheat and prepare:
- Set your oven to 350°F and line that muffin tin—this gives you time to gather everything else while the oven does its thing. Room temperature ingredients matter more than you'd think, so pull out your eggs and dairy about thirty minutes before you start.
- Combine dry ingredients:
- Whisk flour, cocoa powder, baking soda, and salt in a medium bowl until you don't see any streaks of cocoa. This mixing step prevents lumpy pockets later.
- Cream butter and sugar:
- Beat them together for two full minutes until the mixture looks pale and fluffy, like soft serve ice cream. This is where air gets incorporated, which makes your cupcakes rise properly.
- Add eggs one at a time:
- Drop in an egg, beat well, then repeat with the second one. This emulsification is what helps everything stay blended instead of separating.
- Mix wet ingredients:
- Add buttermilk, sour cream, vanilla, green coloring, and vinegar to the butter mixture. Mix until you can't see any streaks of color, but don't overbeat—you'll toughen the batter.
- Combine wet and dry:
- Gently fold the dry ingredients into the wet mixture until just blended, about one minute. Overworking here is the enemy of tender cupcakes.
- Fill liners:
- Divide batter evenly among liners until each is about two-thirds full. This gives them room to rise without overflowing.
- Bake until golden:
- Bake for 16 to 18 minutes, checking at the lower end with a toothpick inserted in the center. It should come out with maybe a crumb or two, not wet batter.
- Cool properly:
- Leave them in the pan for five minutes so they set slightly, then move them to a cooling rack. Cooling completely before frosting prevents the frosting from melting into rivulets.
- Make the frosting:
- Beat softened cream cheese and butter together until smooth and completely combined, then gradually add sifted powdered sugar, vanilla, and salt. Keep beating until fluffy—this takes about two minutes of steady work.
- Frost with confidence:
- Once cupcakes are completely cool, pipe or spread frosting generously on top. If you're piping, a piping bag with a large round tip makes it fast and looks intentional.
 Pin it
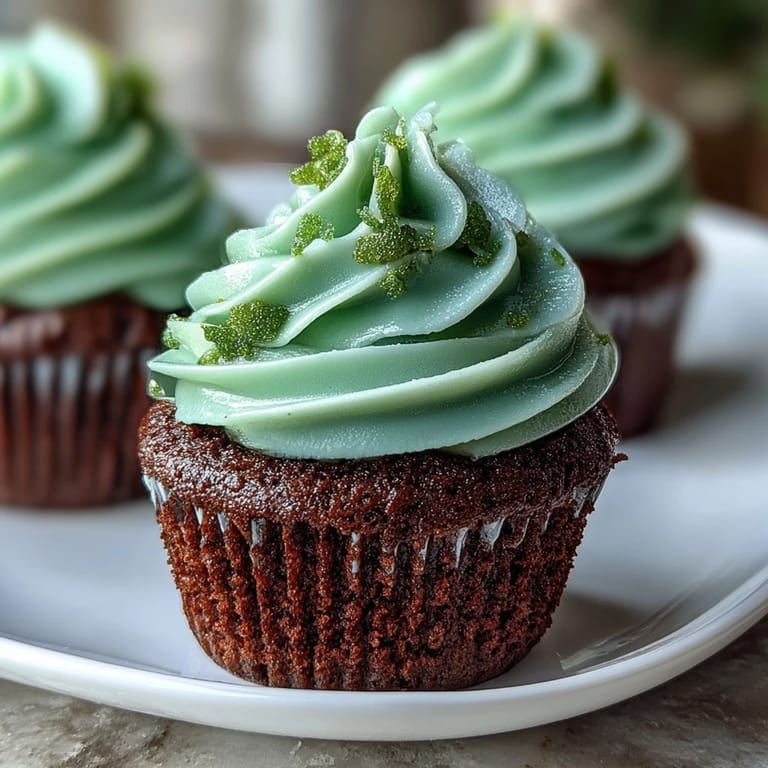
 There's something about the color of these cupcakes that shifts a regular Tuesday afternoon into something a little more festive, even if nobody around you particularly cares about St. Patrick's Day. My kids started requesting them for their March birthdays too, which tells you everything about how much they disappeared from the dessert table.
The Green Coloring Secret
I used to avoid gel food coloring thinking it was complicated or expensive, but once I found it at the grocery store, I realized I'd been creating muddy, weak-looking cupcakes with liquid coloring for no good reason. Gel coloring is concentrated, so you use less of it, which means less liquid in your batter and better crumb structure overall. A single bottle lasts ages because you're using drops instead of teaspoons.
Why the Cocoa and Vinegar Matter
The cocoa powder in the batter isn't there to make these chocolate cupcakes—it's there to deepen the flavor profile so the green coloring doesn't taste artificial or one-dimensional. When I tried skipping it to simplify, the cupcakes tasted flat and overly sweet, almost like colored vanilla cake. The vinegar does something similar by reacting with the baking soda to keep things tender while also making that subtle cocoa taste sharper and more present.
Storage and Serving Notes
These cupcakes stay moist for days if you store them properly, which is the whole point of the buttermilk and sour cream combination. Keep them in an airtight container at room temperature for up to three days, or refrigerate them if your kitchen is warm. The frosting actually firms up slightly when chilled, making them easier to eat, and the emerald green looks even more stunning straight from the fridge.
- Make the batter up to two hours ahead, but don't fill the liners until you're ready to bake.
- Frost these the day you plan to serve them if you want maximum frosting fluidity and shine.
- If you want that fresh mint twist mentioned in the original notes, add a quarter teaspoon of mint extract to the batter instead of extra vanilla.
 Pin it
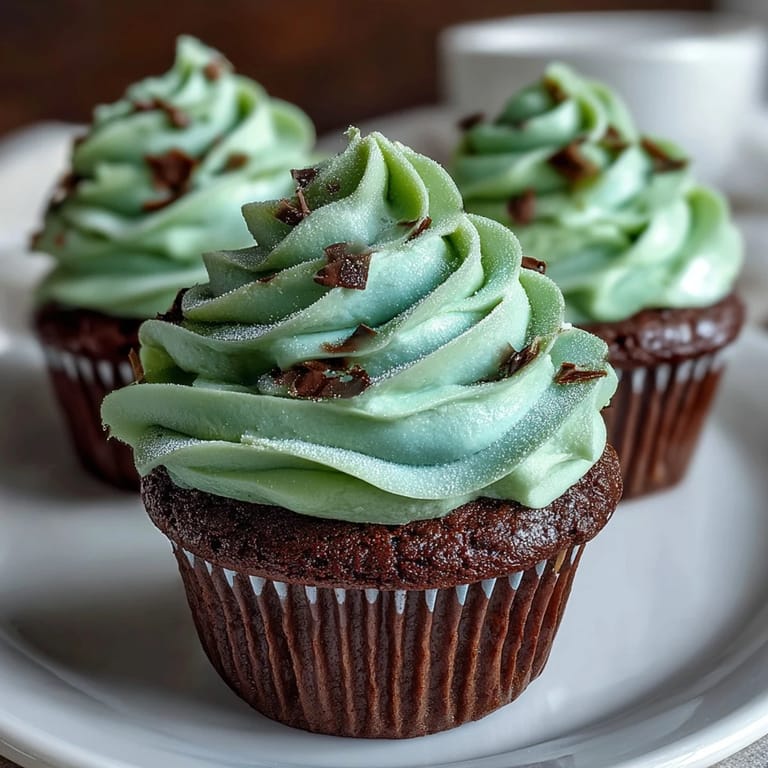
 These cupcakes have become my answer to the question of how to celebrate without making a complicated production out of it. A batch bakes in under an hour, looks incredibly festive, and tastes like you actually know what you're doing in the kitchen.
Recipe FAQ
- → What gives the cupcakes their green color?
The rich green color comes from gel green food coloring, which provides a vibrant hue without altering the cupcake's texture.
- → Can I substitute the buttermilk in the batter?
Yes, use a mixture of milk and lemon juice or vinegar as a buttermilk substitute to maintain the tender crumb and slight tang.
- → How is the cream cheese frosting made smooth?
Beating softened cream cheese and butter together until creamy, then gradually adding powdered sugar helps achieve a smooth, fluffy frosting.
- → What baking time ensures perfect cupcakes?
Baking at 350°F (175°C) for 16–18 minutes ensures the cupcakes are moist yet fully cooked, indicated by a clean toothpick test.
- → Can I add flavor variations to the cupcakes?
Adding mint extract or adjusting the cocoa powder amount offers subtle flavor twists while keeping the classic texture intact.