 Pin it
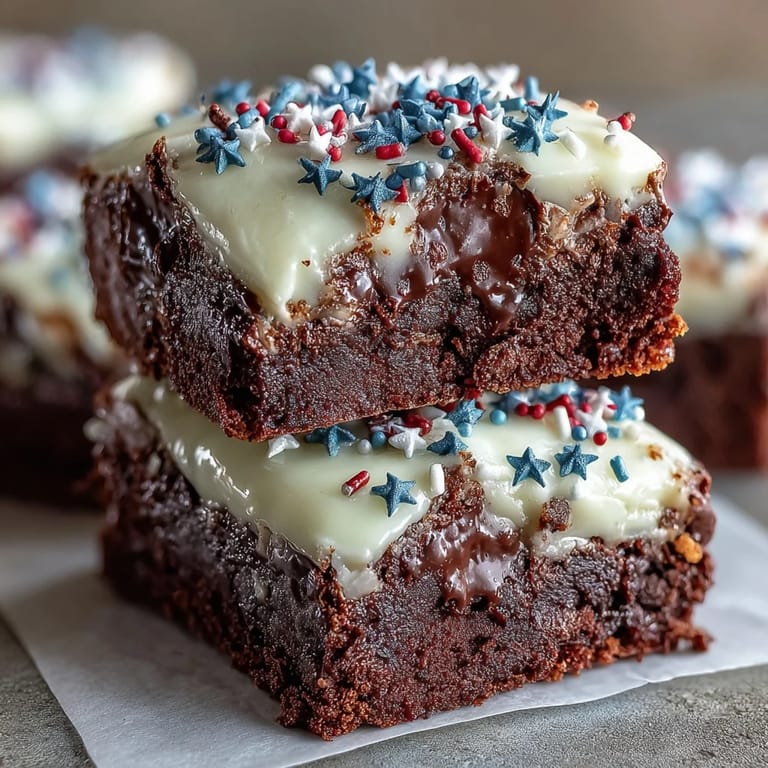
 My neighbor knocked on my door that Fourth of July morning with her kids trailing behind, asking if I could whip up something festive for the block party that afternoon. I had flour, butter, and chocolate on hand, but nothing that screamed celebration until I thought of these tiny brownie bites, which I could frost and dress up with patriotic sprinkles in minutes. There's something magical about taking a simple chocolate base and transforming it into something that feels holiday-ready, and watching those kids' faces light up when they saw the red, white, and blue toppings made the whole rushed morning worthwhile.
I still remember frosting these while my daughter piped whipped cream designs, her tongue poking out in concentration as she tried to keep the lines straight. By the time we'd finished, the kitchen counter looked like a Fourth of July parade had marched through it, with sprinkles scattered everywhere, but the batch sitting on the cooling rack looked absolutely stunning. Those bites became the conversation piece of the potluck, with people coming back for thirds and asking for the recipe.
Ingredients
- Unsalted butter: Use room temperature for the frosting so it beats into a silky base without lumps.
- Granulated sugar: The standard choice for brownie structure, giving you that dense, fudgy crumb.
- Large eggs: These bind everything together and add moisture, so don't skip or substitute.
- Vanilla extract: A small amount goes a long way in balancing the chocolate's intensity.
- Unsweetened cocoa powder: The backbone of flavor, so choose a quality brand you actually enjoy tasting.
- All-purpose flour: Kept minimal on purpose to keep the texture rich rather than cakey.
- Salt and baking powder: Salt deepens chocolate flavor while baking powder gives the tiniest lift.
- Cream cheese: The secret to frosting that tastes indulgent but spreads smoothly, so let it soften completely first.
- Powdered sugar: Sifts through the frosting without beating air into it, keeping it creamy rather than fluffy.
- Milk: Added by the half-teaspoon if the frosting feels too stiff, turning it spreadable without making it runny.
- Red, white, and blue sprinkles: The whole reason these feel festive, so don't hold back on color.
Tired of Takeout? 🥡
Get 10 meals you can make faster than delivery arrives. Seriously.
One email. No spam. Unsubscribe anytime.
Instructions
- Set the stage:
- Heat your oven to 350°F and ready a 24-cup mini muffin pan with paper liners if you have them, or just a light grease if you prefer. Having everything prepared means you can move quickly once you start mixing.
- Build the brownie base:
- Melt the butter in a microwave-safe bowl in 30-second bursts, then stir in sugar, eggs, and vanilla until the mixture looks smooth and glossy. The warmth from the melted butter helps everything combine beautifully.
- Fold in the dry ingredients:
- Sprinkle the cocoa powder, flour, salt, and baking powder over the wet mixture, then stir just until no streaks of flour remain. Overmixing here makes brownies tough, so stop as soon as everything is incorporated.
- Fill the pan:
- Spoon batter into each cup until about 3/4 full, leaving just enough room for them to rise without spilling over. A small cookie scoop makes this faster and more even.
- Bake until fudgy:
- Slide the pan into the oven and bake for 12 to 15 minutes, checking around the 12-minute mark by inserting a toothpick that should come out with moist crumbs still clinging to it. You want fudgy, not cakey, so don't overbake.
- Cool strategically:
- Leave them in the pan for 5 minutes so they set without cooling completely, then turn them out onto a wire rack to cool all the way through. This prevents them from sticking but keeps them tender.
- Make the frosting:
- Beat softened cream cheese and butter together until combined, then add powdered sugar and vanilla gradually while continuing to beat until light and fluffy. If it feels too thick, add milk a half-teaspoon at a time until it spreads easily.
- Crown each bite:
- Once brownies are completely cool, pipe or dollop a generous swirl of frosting onto each one, leaving some chocolate visible so the patriotic colors can shine through. Don't be shy with the frosting.
- Celebrate with color:
- Sprinkle red, white, and blue sprinkles generously across all the frosted tops, then add mini sparkler toppers or festive toothpicks if you want extra pizzazz. This is the fun part where they truly become showstoppers.
 Pin it
 There's a particular joy in watching someone bite into something you made, especially when it tastes even better than it looks. These brownies became the thread that pulled our whole neighborhood together that July afternoon, conversations happening around a plate of chocolate and sprinkles.
The Frosting Matters Most
The frosting is where the magic happens, transforming simple brownies into something that feels special and intentional. I learned this the hard way when I once tried a whipped cream topping instead, and while it tasted fine, it lost that luxurious mouthfeel that makes people close their eyes for a moment. Cream cheese frosting has a subtle tang that plays beautifully against rich chocolate, and when you beat it until fluffy, it becomes mousse-like in texture.
Size Matters for Parties
Mini brownies are genius for celebrations because guests can actually grab one without guilt, and you can make enough quantity to feel generous without spending all day baking. I've brought these to summer gatherings where people end up eating five or six without realizing it, which is exactly what you want. The small format also means the bake time is short, so you can pull these together on the morning of your event.
Storage and Make-Ahead Strategies
These brownies keep beautifully in the refrigerator for three days in an airtight container, so you can actually bake them a day ahead and decorate them morning-of if time is tight. I once baked these on a Wednesday for a Saturday party and they were just as fudgy and delicious when the day arrived. The frosting protects the brownie from drying out, acting almost like an edible seal.
- Freeze unfrosted brownies for up to two weeks, then frost them fresh the day before your event.
- Keep the frosting separate in a piping bag in the fridge and decorate just before serving for the freshest taste.
- Let refrigerated brownies sit at room temperature for 10 minutes before eating so the frosting softens enough to melt on your tongue.
 Pin it
 These brownie bites taught me that sometimes the best recipes are the ones that make people feel something beyond just satisfaction. A little chocolate, some frosting, and the right colors can turn a ordinary afternoon into a memory that sticks around long after the last crumb is gone.
Recipe FAQ
- → What causes fudgy texture in these brownie bites?
The fudgy texture comes from the balanced ratio of butter, sugar, and eggs combined with a moderate amount of flour and cocoa powder, ensuring a moist, dense bite.
- → How do I make the frosting creamy and spreadable?
Beating softened cream cheese and butter together until smooth, then gradually adding powdered sugar and a touch of milk helps achieve a fluffy, spreadable frosting.
- → Can I prepare these brownie bites in advance?
Yes, they can be baked and frosted ahead, then stored in an airtight container in the refrigerator for up to three days without losing freshness.
- → Are there alternatives to traditional flour for dietary needs?
Gluten-free flour can replace all-purpose flour to accommodate gluten sensitivities, though texture may slightly vary.
- → What decorating options enhance the festive theme?
Red, white, and blue sprinkles perfectly evoke patriotic colors; adding mini sparklers or edible glitter brings extra celebration sparkle.