 Pin it
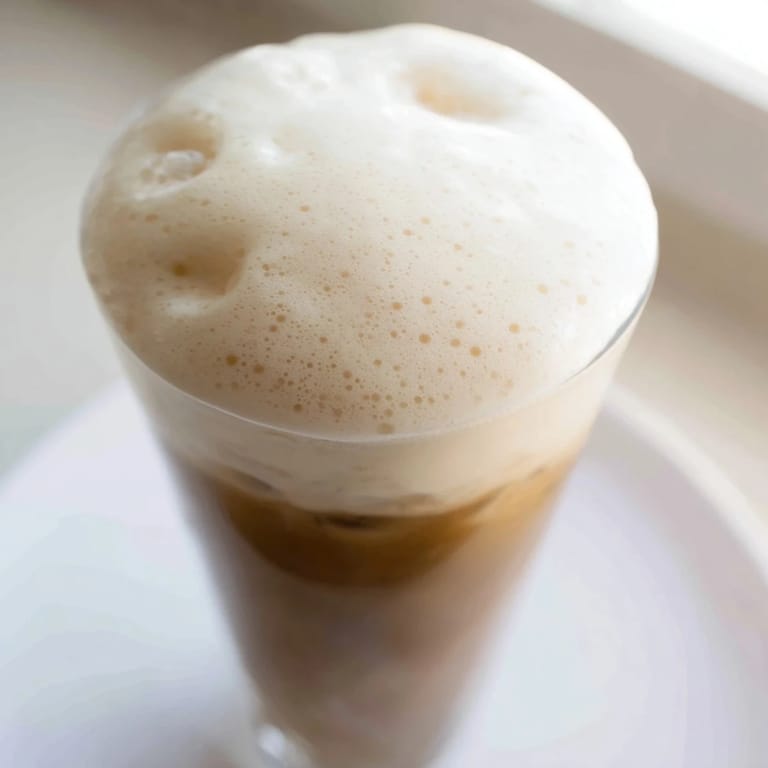
 There's something magical about that moment when you order a cold brew at Starbucks and watch the barista crown it with that impossibly thick, velvety foam. One afternoon, stuck at my desk with a mediocre coffee from the office kitchen, I realized I'd been paying five dollars extra just for air—delicious, luxurious air. That's when I started experimenting with my milk frother gathering dust in a cabinet, and suddenly my homemade cold brews tasted like I'd splurged at the café.
Last summer, I made this for my parents who'd just gotten espresso machines and were deep in their coffee snobbery phase. When I topped their cold brew with homemade foam, they actually paused mid-conversation—and if there's one thing that impresses people who care about coffee, it's the little touches. My mom asked for the recipe before she'd even finished the cup.
Ingredients
- Heavy cream (1/3 cup, cold): This is the backbone of your foam—the fat content is what creates that luxurious texture. Keep it cold straight from the fridge; warm cream won't hold peaks the same way.
- 2% milk (2 tbsp, cold): The milk acts as a stabilizer and lightens the foam slightly so it's not overwhelmingly rich. Don't skip this or substitute with water; the milk proteins are doing real work here.
- Vanilla syrup (1 tbsp): This is non-negotiable for that Starbucks-signature taste. Store-bought works perfectly, but if you have five extra minutes, homemade is worth it—the flavor feels fresher and less artificial.
Tired of Takeout? 🥡
Get 10 meals you can make faster than delivery arrives. Seriously.
One email. No spam. Unsubscribe anytime.
Instructions
- Gather your cold ingredients:
- Pour the heavy cream, milk, and vanilla syrup into your tall glass or frother. Everything must be genuinely cold—I learned this the hard way when I grabbed cream straight from the pantry on a warm day and ended up with soupy disappointment.
- Froth with intention:
- If you have a milk frother, submerge the wand just below the surface and listen for that satisfying whir. No frother? A sealed jar and vigorous shaking for 60 seconds works just as well—your arms get a mini workout, and there's something satisfying about the control you have. Stop when the mixture has roughly doubled and looks thick and creamy.
- Serve immediately:
- Spoon the foam onto your cold brew or iced coffee right away. The foam will start breaking down after a few minutes, so don't let it sit waiting—this is the moment to enjoy it.
 Pin it
 My partner used to make fun of my cold foam obsession until one morning I surprised him with a perfectly topped cold brew before his commute. He came back thirty minutes later asking if I could teach him how to do it—now he makes it better than I do, and I pretend to be annoyed about it.
Flavor Variations Worth Trying
Once you master vanilla, the world opens up. I've experimented with hazelnut syrup on lazy Sunday mornings, caramel on days when I want something more indulgent, and even a touch of cinnamon syrup for fall. The beauty is that the technique stays exactly the same—you're just swapping one ingredient for another, which means even small experiments feel like you're creating something new.
Making Your Own Vanilla Syrup
If you find yourself making this foam regularly, homemade vanilla syrup becomes worth the tiny investment of effort. The flavor feels cleaner and brighter than most store-bought versions, and you can control the sweetness to match your taste. It keeps in the fridge for weeks, so batch it on a Sunday and forget about it until you need it.
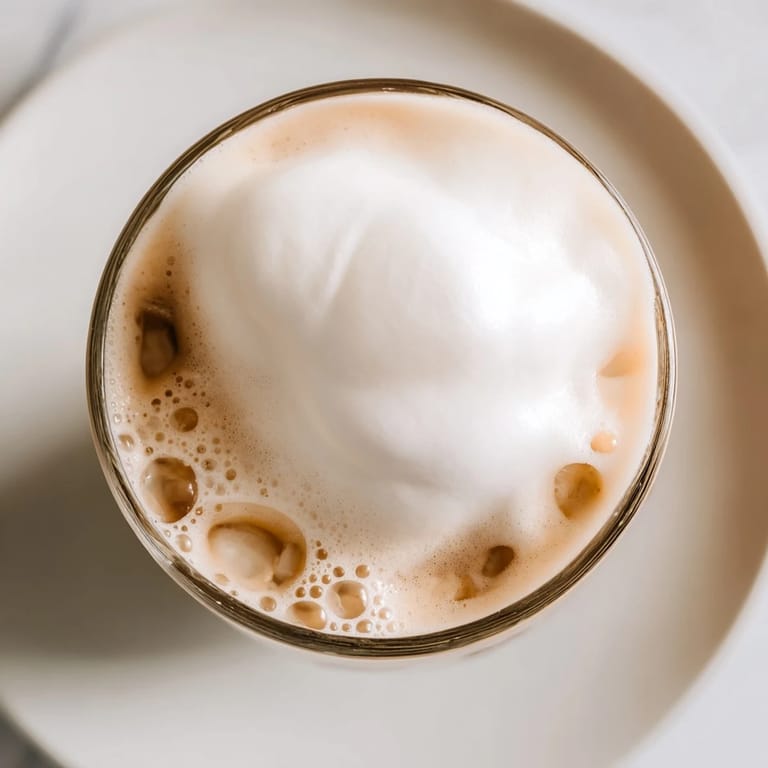
Serving Suggestions and Storage
This foam is best served immediately while it's at maximum volume and silkiness—the texture is truly the star here. If you're making cold brew for multiple people, I recommend frothing individual portions rather than trying to make one giant batch and distribute it, because the foam deflates quickly and no one wants a half-deflated topping. This recipe scales beautifully if you're making multiple servings; just multiply each ingredient and froth in batches.
- Cold foam stays good for about five minutes before it starts to break down and separate.
- Make sure your equipment is completely dry and grease-free before frothing for the best results.
- If you're serving guests, froth right before they arrive so the foam is at its peak texture and they get the full experience.
 Pin it
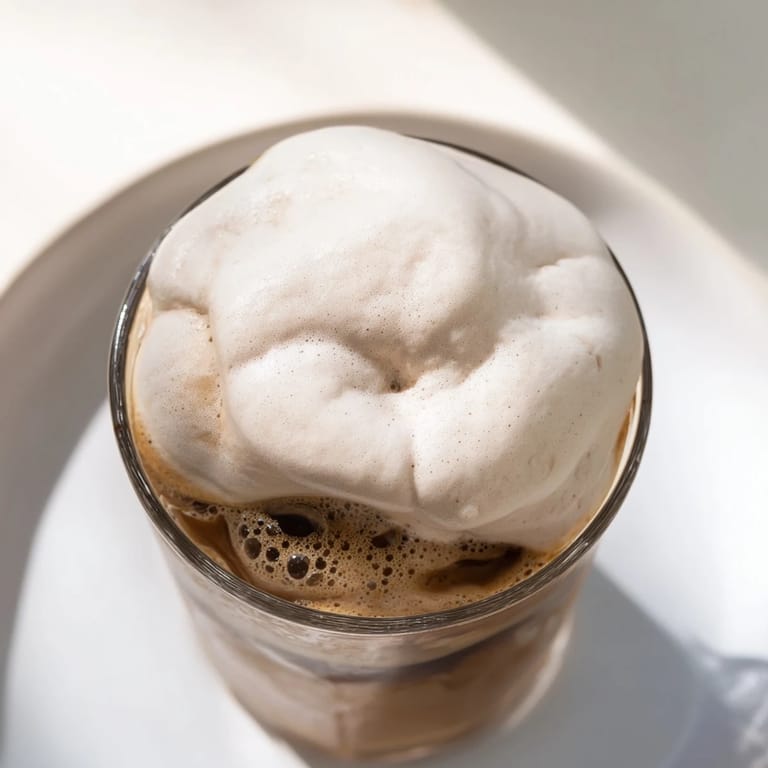
 Once you start making this foam, you'll find yourself looking forward to cold brew season even more than you already do. It's the kind of small ritual that transforms an ordinary coffee break into something worth savoring.
Recipe FAQ
- → What ingredients make the cold foam fluffy?
The combination of cold heavy cream and milk whipped together creates the airy, fluffy texture of the foam.
- → Can I use different syrups to flavor the foam?
Yes, vanilla syrup can be replaced with hazelnut or caramel syrups for varied flavors.
- → What tools work best to whip the foam?
Electric milk frothers, handheld whisks, or shaking vigorously in a sealed jar all produce a smooth foam.
- → How soon should the foam be served?
Serving immediately after whipping preserves the foam's light texture and appearance.
- → Can the foam be made lighter?
Yes, increasing the milk ratio relative to cream creates a lighter, less dense foam.