 Pin it
 My sister texted me a photo of a peanut butter cup melting on her tongue with the caption 'why isn't this a brownie yet?' and honestly, it was the nudge I needed to stop wondering and start baking. That afternoon, my kitchen smelled like cocoa and butter, and by the time these came out of the oven, I understood exactly what she meant. The moment you bite into that fudgy center and hit a pocket of peanut butter cup, it's game over. This isn't just a dessert—it's the answer to a question nobody asked but everyone wanted answered.
I brought these to a potluck last spring where everyone was supposed to bring something 'light,' and I showed up with a whole pan of these anyway. The look on people's faces when they bit into one—that moment between the dark chocolate exterior and discovering the peanut butter cup treasure inside—made me feel like a kitchen magician. Someone asked for the recipe before they'd even finished their first square, and I knew right then these would be in my regular rotation forever.
Ingredients
- All-purpose flour: One cup gives you structure without heaviness—this is where you don't want to skimp because it keeps the brownies from spreading into a puddle.
- Unsweetened cocoa powder: The 80 grams here is the whole soul of the brownie; use good quality stuff because you can taste the difference immediately.
- Baking powder: Just a half teaspoon lifts these so they're fudgy but not dense, which matters when you've got melty peanut butter cups inside.
- Salt: A pinch balances everything and makes the chocolate flavor pop in a way that surprises people.
- Unsalted butter: Melted and combined with sugar, this creates that glossy, luxurious base that makes these feel indulgent.
- Granulated sugar: Two cups might seem like a lot, but it's what gives you that shiny top and fudgy crumb.
- Eggs: Beat them in one at a time so they emulsify properly and add richness without making things gummy.
- Vanilla extract: Two teaspoons adds warmth and complexity that rounds out the chocolate and peanut butter.
- Semi-sweet chocolate chips: A full cup tucked throughout adds extra chocolate moments between bites.
- Mini peanut butter cups: Sixteen of these scattered in the middle is the whole point—they create those melty, magical pockets.
Tired of Takeout? 🥡
Get 10 meals you can make faster than delivery arrives. Seriously.
One email. No spam. Unsubscribe anytime.
Instructions
- Set your oven and prep your pan:
- Preheat to 350°F and line that 9x13-inch pan with parchment paper, leaving enough overhang so you can lift the whole thing out later. This step saves you from brownies that stick and frustration.
- Combine your dry ingredients:
- Whisk together flour, cocoa powder, baking powder, and salt in a medium bowl until everything is evenly mixed. This prevents lumps of cocoa from showing up in your final brownies.
- Build your wet base:
- Pour melted butter into a large bowl, add sugar, and whisk until it looks glossy and combined. You're creating the foundation of fudginess here.
- Add eggs carefully:
- Beat in eggs one at a time, stirring well after each addition so they incorporate smoothly. This takes an extra minute but makes a real difference in texture.
- Stir in vanilla:
- A quick stir of two teaspoons vanilla extract rounds out all those chocolate and peanut butter flavors.
- Fold in dry ingredients gently:
- Gradually fold the flour mixture into the wet ingredients until just combined—overmixing creates tough brownies, and nobody wants that. You want a few flour streaks to disappear, then stop.
- Add chocolate chips:
- Gently fold in the chocolate chips so they're distributed throughout but not crushed.
- Layer the batter:
- Spread half the batter evenly across your prepared pan, creating a smooth, even layer as your chocolate base.
- Place peanut butter cups:
- Arrange 16 mini peanut butter cups (or 8 standard ones halved) evenly over the batter in a simple grid. Space them so each square will get one or share between two.
- Top with remaining batter:
- Spoon the second half of batter over the peanut butter cups and smooth it with a spatula until they're completely covered. This keeps them from drying out while baking.
- Bake to fudgy perfection:
- Bake for 28 to 32 minutes—the exact time depends on your oven, so start checking at 28 minutes with a toothpick. You want it to come out with a few moist crumbs still clinging to it, not clean.
- Cool completely:
- Let them cool in the pan on the counter until they're room temperature, then use that parchment overhang to lift them out. Cutting warm brownies is a mess; cold brownies slice cleanly.
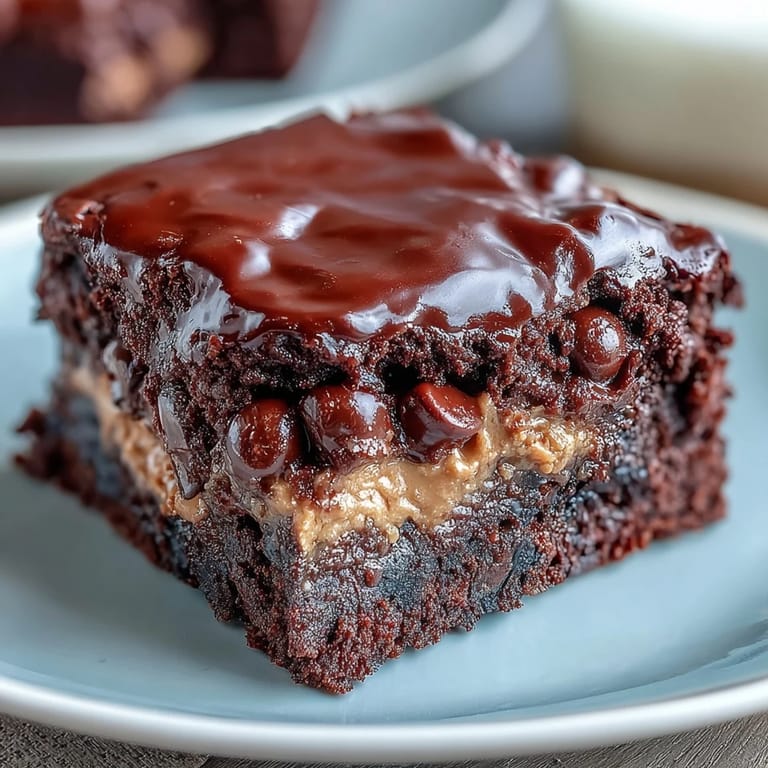
 Pin it
 My neighbor stopped by while these were cooling and the smell alone had her leaning against the counter asking when she could take a slice. That's when I realized these brownies do something most desserts don't—they make people slow down and actually savor the moment instead of rushing through. That simple pause, that genuine 'wow,' that's what keeps me coming back to this recipe.
Why These Brownies Beat Expectations
Most brownie recipes deliver chocolate or peanut butter, forcing you to choose a side. These refuse to choose, and that's their whole charm. The structure stays stable enough to hold a layer of peanut butter cups in the exact middle, which means every single slice from corner to center gets that treasure. I've learned that the real magic happens when you respect the balance—rich but not overwhelming, fudgy but not raw, indulgent but not heavy.
Storage and Next-Day Thoughts
These actually improve overnight as flavors settle and deepen, so baking them a day ahead is smart if you're hosting something. Keep them in an airtight container at room temperature for up to four days, or wrap them individually and freeze for up to two months. Cold brownies are denser and more chocolatey, warm ones are softer and the peanut butter cups re-melt slightly, so you get to choose your own adventure depending on timing.
Customization Without Losing the Plot
I've experimented with swaps because that's what curious cooks do, and some work better than others. Dark chocolate chips instead of semi-sweet push things towards sophisticated, while caramel candies create a different kind of surprise that's equally satisfying. The core brownie recipe is solid enough to handle these changes without falling apart, which is the sign of a truly reliable recipe.
- A drizzle of melted peanut butter over the cooled brownies adds richness and makes them feel extra special without real effort.
- Dust the top with fleur de sel right after baking for a sweet-salty moment that catches people off guard in the best way.
- Serve slightly warm with vanilla ice cream if you want to turn these from 'nice dessert' into 'unforgettable dessert.'
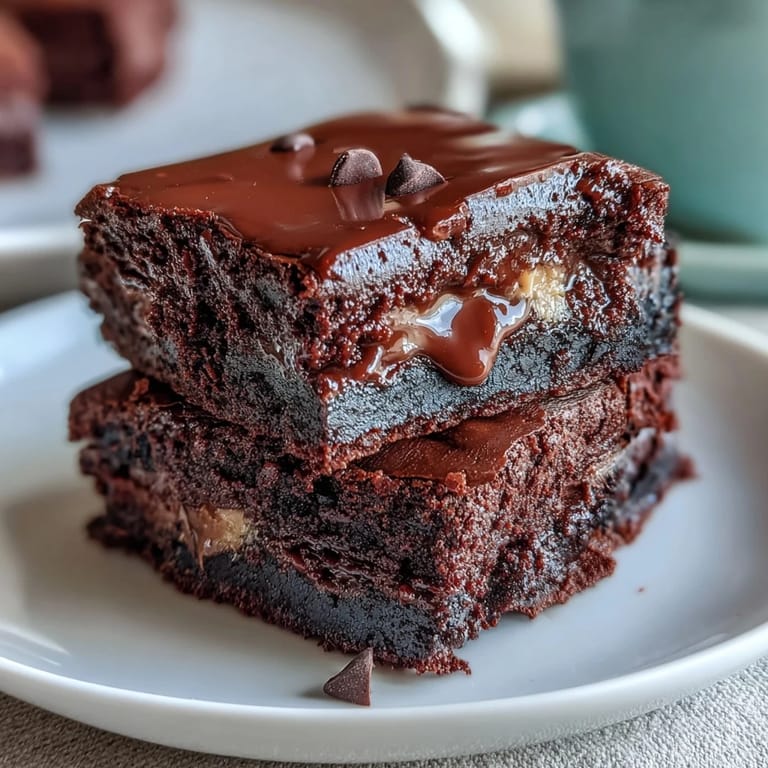 Pin it
 These brownies have taught me that the best desserts are the ones that make people forget about everything else for a moment. Bake them, watch someone's face when they taste that peanut butter cup surprise, and you'll understand why this recipe never leaves my rotation.
Recipe FAQ
- → How do I prevent the peanut butter cups from melting too much?
Gently fold the peanut butter cups into the batter and cover them completely to help maintain their shape during baking.
- → Can I use other mix-ins besides peanut butter cups?
Yes, caramel candies or chocolate hazelnut spread work well as alternatives for a unique twist.
- → What is the best way to test if the brownies are done?
Insert a toothpick into the center; it should come out with a few moist crumbs but not wet batter.
- → How should I store these brownies?
Store them in an airtight container at room temperature for up to 3 days or refrigerate for longer freshness.
- → Can these brownies be served warm?
Yes, serving them warm enhances the gooey texture; try pairing with vanilla ice cream for extra indulgence.